Why it’s Important to Check your Ceiling Cracks before it’s too late

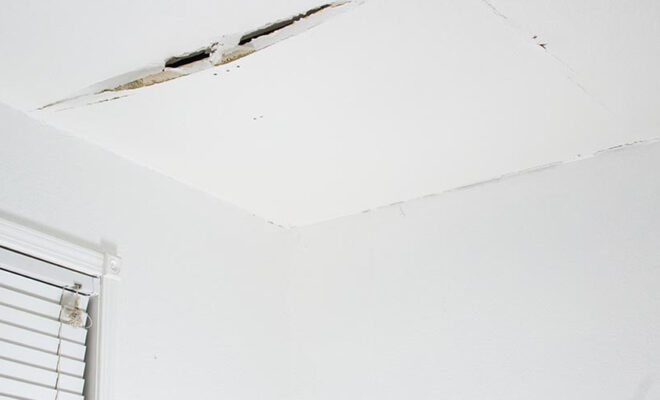
As a business that specializes in ceilings and insulation, we have seen our fair share of cracks. Some cracks are minor, completely normal and nothing to worry about, while others are a little more serious in size and will cost more to repair. However, there is one house we’ll never forget. There was major cracking everywhere.
When we entered that home, after a very worried homeowner contacted us, we discovered cracks on almost every ceiling in the house. Of course, we couldn’t tell where those cracks came from until we did a full inspection. Ceiling cracks can be caused by a range of different factors and without an inspection, we couldn’t be sure of the exact causes. And without knowing the cause of the cracking, we can’t recommend the best cause of repairs.
Common causes of ceiling cracks
- High winds
Did you know that high winds can cause your house to move? Most of the time, this movement is so minor that it’s barely noticeable, but it can be enough to cause your ceiling, roofs, and floors to shift every so slightly. When that happens, cracks can occur.
- Temperature variations
Building materials tend to expand when it’s warm and contract when temperatures cool. Unfortunately, not all materials expand and contract the same amount and at the same rate. Over time, this can cause ceiling cracks, especially smaller ones.
- Load differences
Over the years, your house is going to continue to settle. This means that the load distribution of your home is going to change slightly and that can cause cracks in your ceiling. This can also happen when you add even more weight to an upstairs room. What was a manageable load for the ceiling may now be unmanageable, which could be the reason why cracks are forming.
- Materials drying out
Many people think that when they have older homes, everything should be dry. However, when you have a leak, materials can get wet and need to dry all over again. This is quite common, and we see it all the time. In fact, this was the cause of the home we mentioned above. We simply found the leak, made sure it was repaired, and then fixed the cracks in the ceilings.
Types of ceiling cracks
There are many different types of cracks you will see in your ceiling. Some of them may not be very noticeable and may not seem too severe. However, small cracks are easier to repair than larger cracking, so it’s always best to proactively repair minor cracks as they appear, rather than waiting for the damage to get worse.
- Super small thin cracks
Super small thin cracks are often referred to as spider web cracks. They usually occur as a house gets older. Most of the time, humidity and a change in the amount of weight above the ceiling are the most common reasons why these cracks occur.
- Thin straight cracks
If you see a single thin straight crack in your ceiling, it is usually caused by a joint that was not taped properly. You can easily have this repaired or simply leave it alone.
- Vertical cracks
Vertical ceiling cracks are usually caused by structural issues. Those lines can also continue down the walls when the structural integrity of a home is the problem.
- Cracks with bowing ceiling
Cracks with a bowing ceiling tend to occur if the roof is too heavy for the home or there is more weight on the roof than there should be. These types of cracks need to be fixed right away before your ceiling collapses.
- Discolored cracks
Discolored cracks are usually the result of water damage and should be fixed immediately.
Where to Look for ceiling cracks
If you are not the type of person to look at your ceiling all the time (and many people don’t), you probably have no idea where to even start looking for cracks in your ceiling. Thankfully, we have a handy list of the most common areas to find ceiling cracking:
- In the corners
- In the middle of the ceiling
- Near load bearing walls
- Where the joints are located
How to repair a ceiling crack
Just like repairing your roof, repairing small cracks in your ceiling is not as difficult as it may seem, as long as you know what you are doing. You will want to begin by making the crack larger with a utility knife. This may seem counter-intuitive, but it will remove any damaged materials that are inside the crack.
After you have all the damaged material out, you can sand the area and clean it with a damp cloth. A layer of drywall compound will have the crack filled in no time, but you won’t be finished with your repair work just yet.
A piece of tape, whether fibreglass mesh or adhesive paper, must be applied over the compound. More drywall compound must then be applied over the tape. Once the second layer of compound is dry, you can sand the area once more and paint it to match the rest of your ceiling.
It is important that you take your time as you are following these steps, or you will have a large lump where your crack used to be. Plus, if you do not allow the area to dry, you will be inviting moisture in, which can cause a new crack to form.
While we gave you the steps you must take to repair the cracks in your ceiling, it is still best to call in the ceiling repair professionals. A ceiling pro will know when an innocent looking crack is not as innocent as it seems. Plus, they have made so many ceiling crack repairs that they can get it done in less time with the best results.
Contributor Bio:
Vinnie has over 20 years of experience in all things roof, ceiling & insulation related. Being the leading roof repairs expert in Perth, via Roof Repairs Perth WA, Vinnie has also launched RCI Perth as an expansion project to provide a one-stop-shop to cater for all roofing, ceiling & insulation needs.


Covid-19 UAE: 10-Day Quarantine Mandatory in Dubai for Close Contacts
Export Shipping Documents Checklist to complete your First Trade